Ubuntu/Debian Automated Install Script
To make it easier we've made a script which you can run on a running storj node machine to provide data to StorjDashboard.
Steps:
- Step 1 : Login and make sure you are ROOT
- Step 2 : Update the package lists
- Step 3 : Run the following
sudo mkdir -p /storjdashboard && cd /storjdashboard && curl -s https://raw.githubusercontent.com/storjdashboard/storjdashboard/main/install/deb_ubuntu/install.sh -o installer.sh && bash installer.sh
If you have any issues during the installation please go to the troubleshooting section
What Does The Automated Script Do?
Our automated install script is designed for use on a clean ubuntu system with just docker and storj installed. The most common issue with using the automated script is if you don't run it in ROOT or you haven't updated the package lists.
Automated Install Steps
- Asks you for EXTERNAL HOSTNAME
- Example: this would be domain.ddns.net if you have a static IP you could also use that 65.68.44.63
- Asks you for EXTERNAL PORT
- Example: 28000 or a similar port you wish to open for your NGINX
- make sure you open the port on the router and any firewalls including inside Ubuntu if you have UFW active or similar.
- If you have a second node, you will need to choose a different port for example 28001 and again make sure its open on routers and firewalls.
- Asks you for INTERNAL IP:PORT to your storj dashboard
- Example: 192.168.0.100:14002
- Installing NGINX
sudo apt-get install nginx -y log file: /storjdashboard_logs/nginx/
- Installing PHP
sudo apt-get install php-fpm -y log file: /storjdashboard_logs/php/
- NGINX Web Directories & Server Files
- Web Directory:
/var/www/
- Configuration File:
/var/www/<HOSTNAME>/config.php
- NGINX Server Config:
/etc/nginx/sites-enabled/
- Display of your URL to test the server
Ubuntu/Debian Manual Installation
These steps are generally for those who want to do each step, step by step. We have provided the steps below. We advise using the manual installation method to isolate any errors you might be having with your installation.
If the auto-install script hasn’t worked for you please run the uninstall script first.
The manual steps below may also work for those machines not listed within our tested environments as listed above in our requirements.
Our requirements for StorjDashboard are simply running a NGINX+PHP server within the same environment as the storj node.
If you have VM environments for running storj node you could if you wanted to set up a separate VM to run the NGINX+PHP web server.
Manual Install Steps
- Login and make sure you are ROOT
- Update the package lists
- Installing NGINX
sudo apt-get install nginx -y
- Install PHP
sudo apt-get install php-fpm -y
- If your system does not know
php-fpm you will need to use the latest version which your system will install
Example: sudo apt-get install php7.4-fpm
- Make a new folder for your web files and download the GIT files
sudo mkdir /var/www<*HOSTNAME*>wget -O "/var/www/<*HOSTNAME*>/index.php" https://raw.githubusercontent.com/storjdashboard/storjdashboard/main/public/index.phpwget -O "/var/www/<*HOSTNAME*>/daily.php" https://raw.githubusercontent.com/storjdashboard/storjdashboard/main/public/daily.phpwget -O "/var/www/<*HOSTNAME*>/pay.php" https://raw.githubusercontent.com/storjdashboard/storjdashboard/main/public/pay.phpwget -O "/var/www/<*HOSTNAME*>/audit.php" https://raw.githubusercontent.com/storjdashboard/storjdashboard/main/public/audit.php
- Make PHP configuration file
nano /var/www/<*HOSTNAME*>/config.php
- Replace HOSTNAME and PORT with your actual storj node dashboard details (example: 192.168.0.100:14002)
<?php $ip="<*HOSTNAME*>:<*PORT*>"; $auth = "<*CODE*>"; ?>- You will need to obtain the auth CODE from the portal when you have created your node.
- Make NGINX host configuration file
nano /etc/nginx/sites-enabled/<*HOSTNAME*>
- Replace accordingly when pasting
*Note - PORT = NGINX web port (typically using 28001)
server {
listen <*PORT*>;
server_name <*HOSTNAME*>;
root /var/www/<*HOSTNAME*>;
index index.php;
location ~ \.php$ {
include snippets/fastcgi-php.conf;
fastcgi_pass unix:/run/php/php-fpm.sock;
}
}
-
sudo ln -s /etc/nginx/sites-available/<*HOSTNAME*> /etc/nginx/sites-enabled/
- Test NGINX configuration
sudo nginx -t
Should return
nginx: the configuration file /etc/nginx/nginx.conf syntax is ok
nginx: configuration file /etc/nginx/nginx.conf test is successful
- Restart NGINX
sudo systemctl restart nginx
- Test your webserver
http://<*HOSTNAME*>:<*PORT*>
Windows Install
- Requirement
- Windows 7+
- Visual C++ Redistributable for VS x64 [DOWNLOAD]
Steps:
- Step 1 : Download NGINX+PHP pre built package
- Step 2 : Download GitHub Files
- Windows 7
- Windows 10
- Within the extracted folder, run the Win10-download_files.cmd
- Step 3 : Edit Config File
- There is a config file that requires editing within C:\storjdashboard_server\nginx\html\ (config.php)
- Replace the HOSTNAME and PORT with the internal access dashboard ip and port for example 192.168.0.100:14002
<?php $ip="HOSTNAME:PORT"; $auth = "CODE"; ?>
- You will need to obtain the auth CODE from the portal when you have created your node.
- (optional) Step 4 : Edit NGINX config
- Located: C:\storjdashboard_server\nginx\conf\ (nginx.conf)
Multiple Nodes
We don't currently have config with multiple nodes on windows, however by editing the NGINX.CONF this is possible to create an additional server on example: port 28001 and have another directory by copy and pasting all files from the original html directory to example: html2 directory.
If you have any issues during the installation please go to the troubleshooting section
Updating NGINX Files
Updating the NGINX files is as simple as updating from the GitHub page.
- Ubuntu Updater
- Run this as ROOT to enable access to all files - If you have changed any folder access for normal user access you don't need to run this as root.
sudo mkdir -p /storjdashboard && cd /storjdashboard && curl -s https://raw.githubusercontent.com/storjdashboard/storjdashboard/main/update/deb_ubuntu/update_git_files.sh -o update_git_files.sh && bash update_git_files.sh
- Windows 10 Updater
- Running the CMD Win10-download_files.cmd will update all files - *you may need to check for any changes to config.php
- Windows 7 Updater
- This is a manual task of downloading the individual files.
Right Click Save-As - To the folder within C:\
File 1 | File 2 | File 3 | File 4
- Windows App Updating
- The windows app refreshes the GitHub pages every 1 hour to make sure users have the latest version of the files.
- The app will not update it self currently but as we progress to work on the web based dashboard portal we will come back to the windows app later in time or to repair any bugs we have seen. However the app is tested in Windows 10 and Windows 7.
Firewall Rules
Unblocking certain ports is required for StorjDashboard to work correctly.
You are only required to unblock the NGINX port (28000... or the port you choose during setup)
Create Node
 select overview
 click New above the node list

Hostname and NGINX Port (the port of the web server - not 14002, 28967...)

Notifications - (this is optional)
Follow step 2 in the Edit Node section to create a NGINX Auth Token for your config.php file.
Don't forget to Enable your node  Click 'Enable'
Note*: If the node doesn't go to ACTIVE status - This is likely because your NGINX is not visible to our servers/public.

Raise a support ticket if you need further specific support for setting up.
Edit Node
 Select Edit next to the created node

Create an NGINX auth token by clicking Change Auth Token
If you already have one you can use this button to change it - *Note: You will need to update config.php
COPY your auth token and add it to your config.php file. (replace the <*CODE*> section)
<?php $ip="<*HOSTNAME*>:<*PORT*>"; $auth = "<*CODE*>"; ?>
From this screen you can also edit the Node Nickname and Hostname details
Notifications are also managed from this screen for each individual node
Delete Node / Remove Node
Select Edit next to the created node
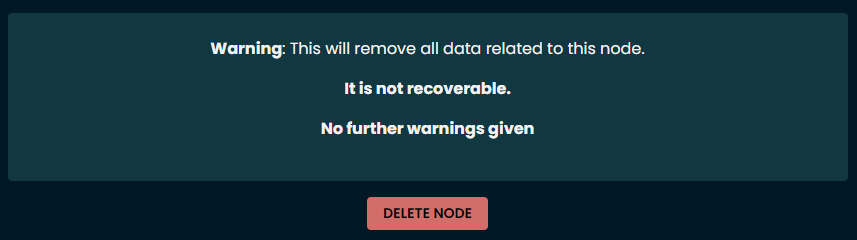
You will see this at the bottom of the page. Press DELETE NODE if you are happy to remove all data associated with this node.


